Salt

Salt recipes

Over the years, I’ve developed a bit of an obsession with salt. Ever since my shoot at Læsø Salt, I’ve been testing recipes, using salt as a main part of the dish. Wether it be preserving, a cooking technique or just adding a salty flavour to the food. The whole thing has been quite an experience, entering the world of recipe writing! I’ve been fortunate enough to have my salt recipes published in the current summer issue of NORD magazine along with my article about Læsø Salt Works.

Below follows the unedited version of the article, and over the next few weeks, I’ll share a series of blog posts, with my salty recipes:
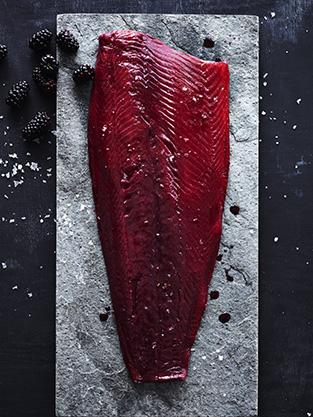
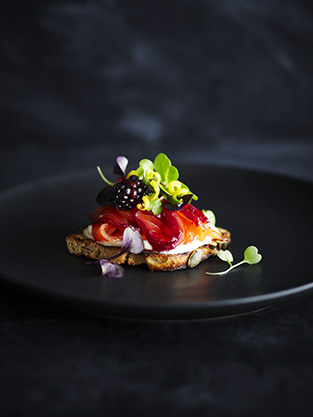
BLACBERRY GRAV LAX
ZINGY MARGARITA & PINK GRAPEFRUIT MARGARITA
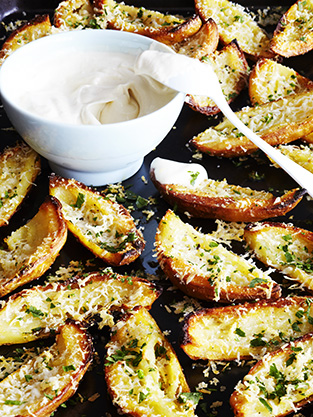
SALT & VINEGAR POTATOSKINS WITH TAHINI, SOUR CREAM DIP
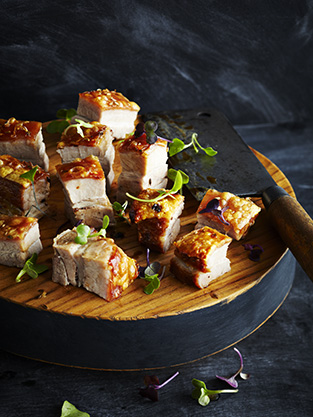
PORK BELLY IN BRINE WITH CRISPY CRACKLING
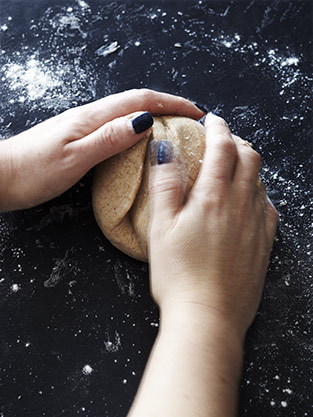
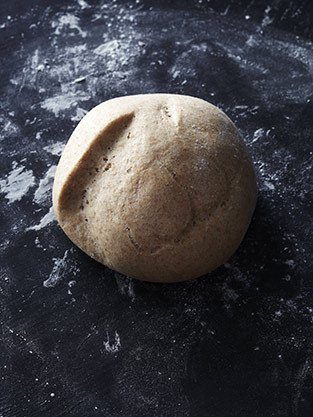
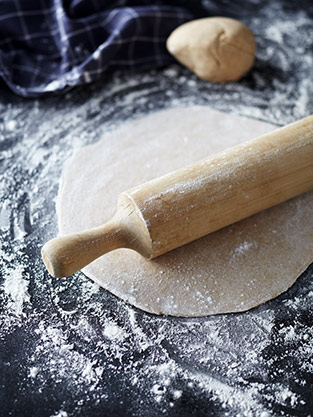
SALT DOUGH LEG OF LAMB
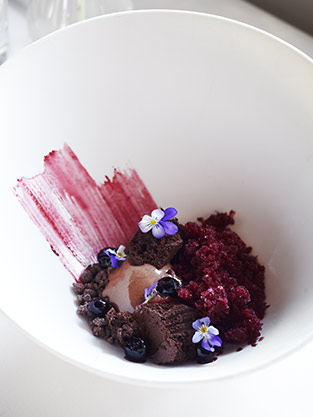
SALTED CHOCOLATE AND CARAMEL TART(S)
GOLDEN PAVLOVA WITH SUMMER BERRIES AND SALTED CHOCOLATE SAUCE
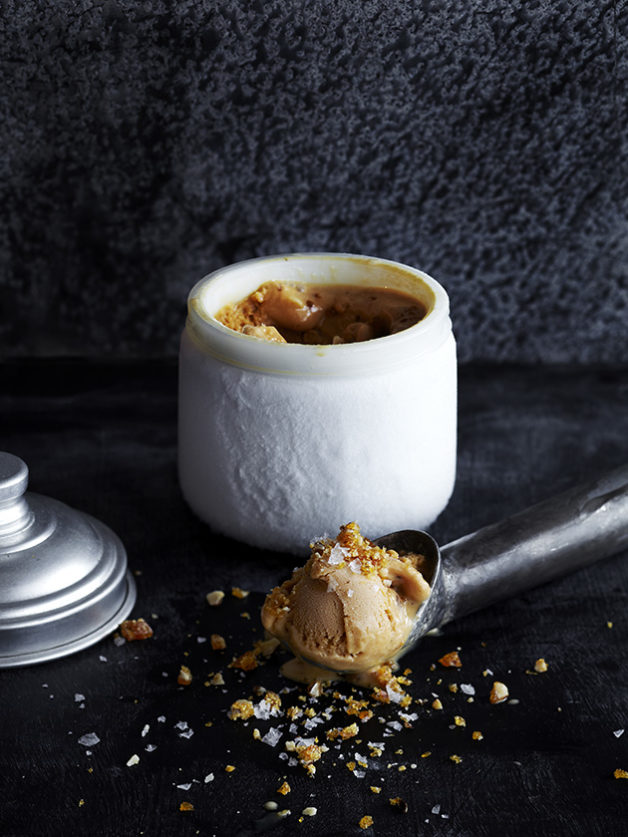
SALTED CARAMEL ICE CREAM (you’re gonna wanna check back for this one…)
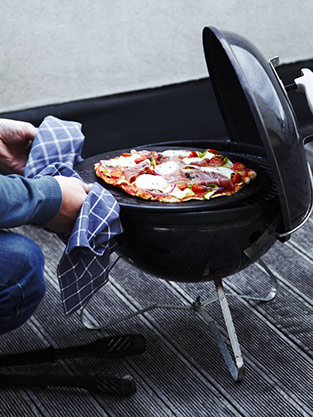
Cooking with Salt Cooking with Salt Cooking with Salt Cooking with Salt Cooking with Salt Cooking with Salt Cooking with Salt Cooking with Salt

COOKING WITH SALT
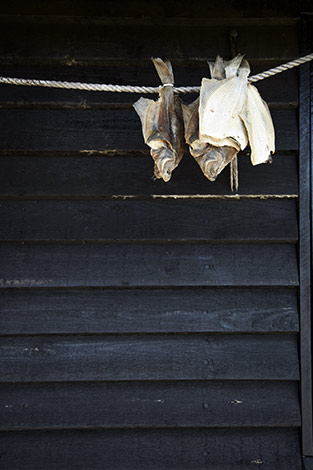
Salt has been used for cooking for thousands of years, in many cultures around the globe. Before the invention of the refrigerator, salt has been one of the most important preservation methods of meat and fish and as one of the 5 main flavors (sweet, sour, salty, bitter and umami), salt is an important and recognizable part of our daily life when it comes to cooking.

The modern day’s introduction of ready-made foods and fast food has given salt a really bad reputation. However, there are many ways to utilize the salt’s good qualities in the kitchen to preserve, slowcook or give untraditional taste in the sweet kitchen.

Laesoe Saltsyderi Laesoe Saltsyderi Laesoe Saltsyderi Laesoe Saltsyderi Laesoe Saltsyderi Laesoe Saltsyderi

A TRULY IDYLLIC PLACE!
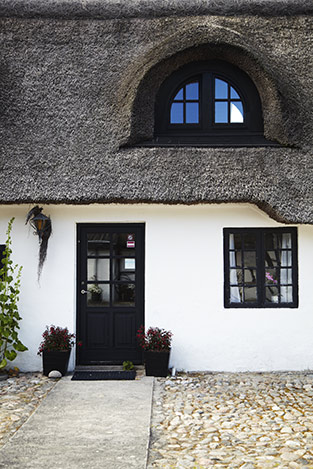
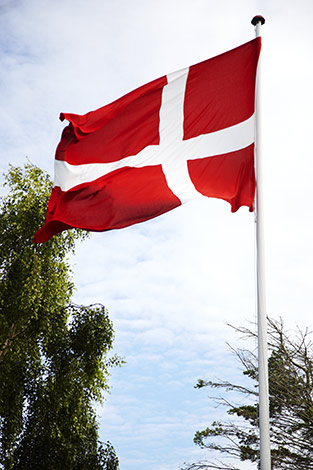
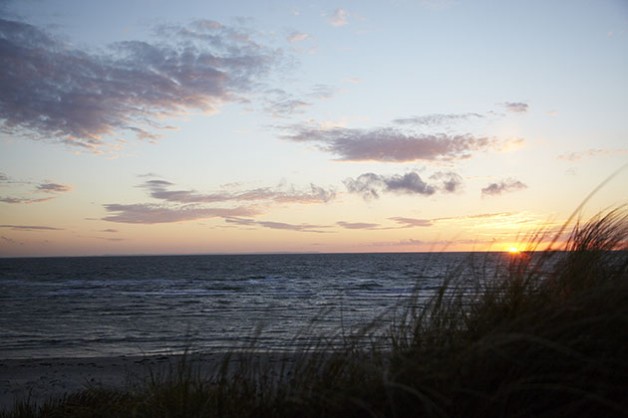
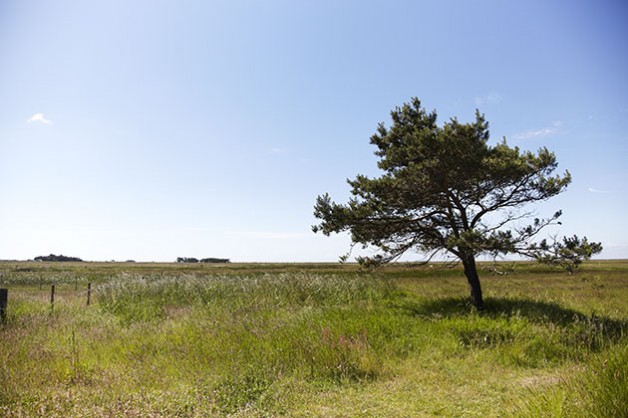
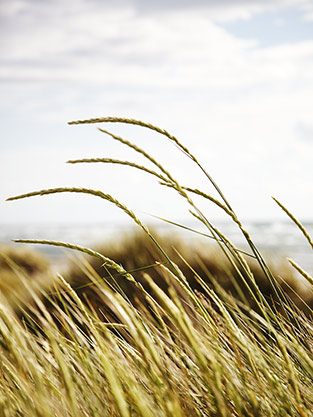
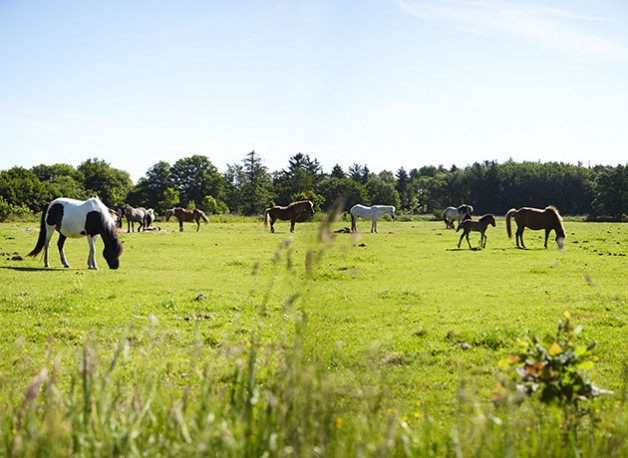
We are on the island of Læsø in Denmark. Læsø is a small island in Kattegat, just off the east coast of the peninsula Jutland, Denmark. Half an hour sailing from Frederikshavn you will find this idyllic island, also called the gem of Kattegat. When you leave the ferry (or almost already when boarding) you know that you are on island time. It is quite a wind blown place but also peacefull. It is filled with nostalgia and the passing days of old Danish fishermen and village charm. This is really the outskirts of Denmark, but if you feel stressed, you’ve come to the right place: Here you can relax!

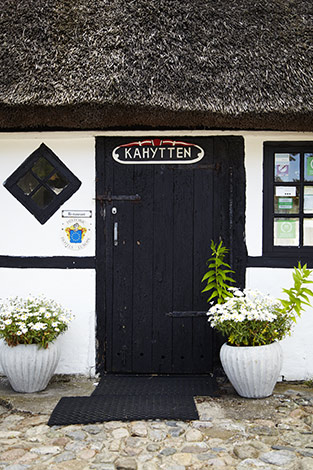
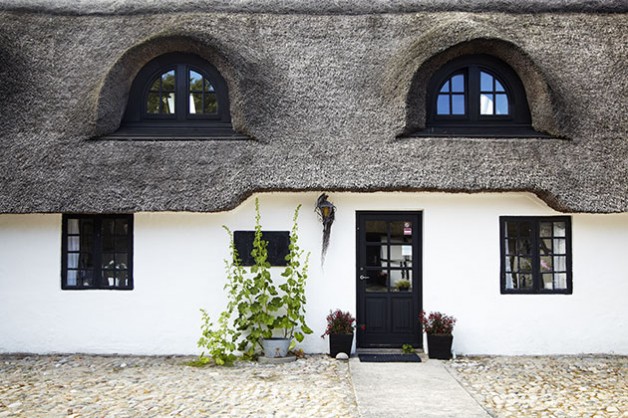
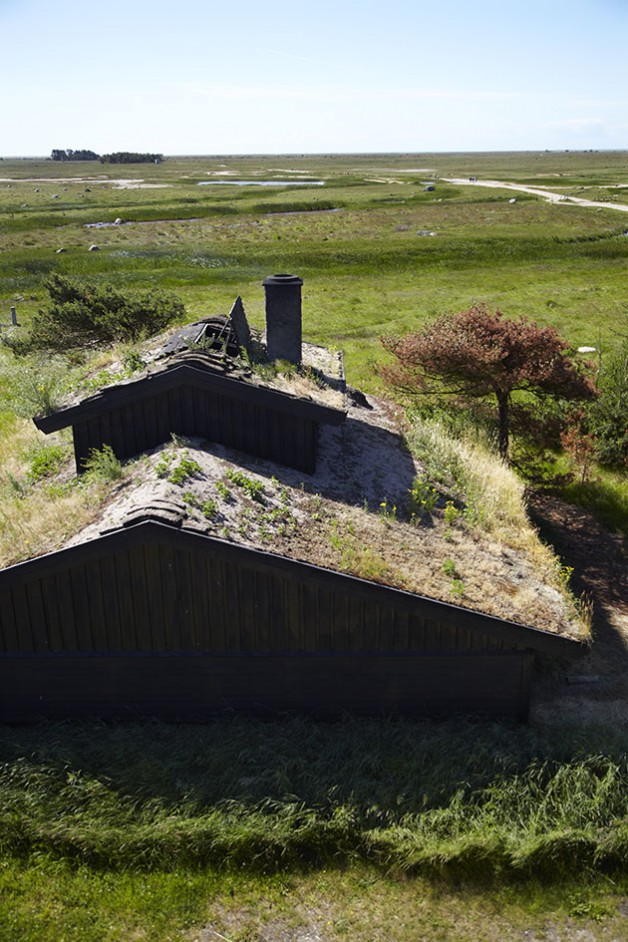
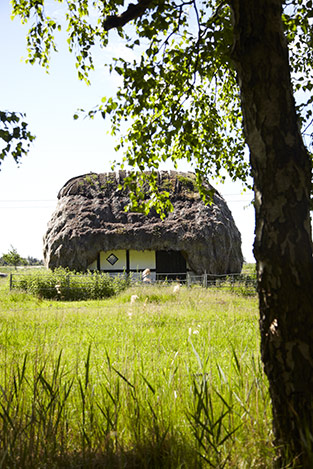
The island has a fantastic and unique nature and you will find the beauty in the little things. The island is known for its scampi festival in August and the cute timbered houses with seeweed roofs.

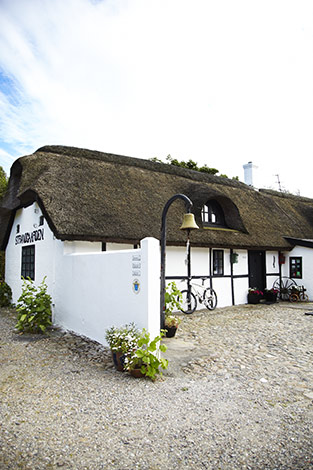
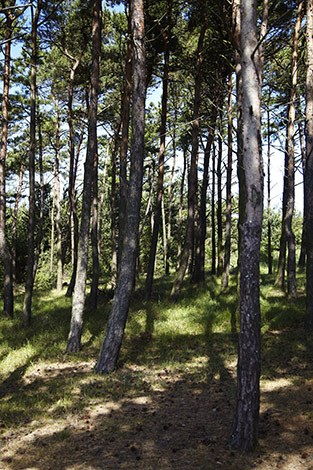
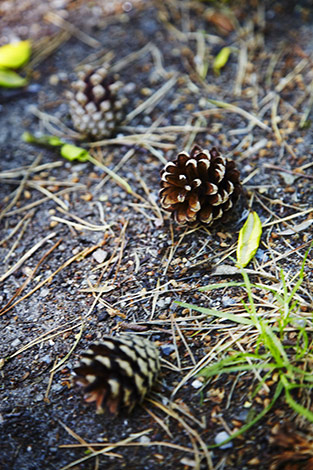
On the edge of a pine forest, south of Byrum, bordering the open part of the truly windy parts of Læsø lies Læsø Saltworks. It is both a place where they make Læsø Salt, but also a tourist attraction that in a very gripping way, tells the story of life on Læsø in the past and gives a living sight of how to make salt.

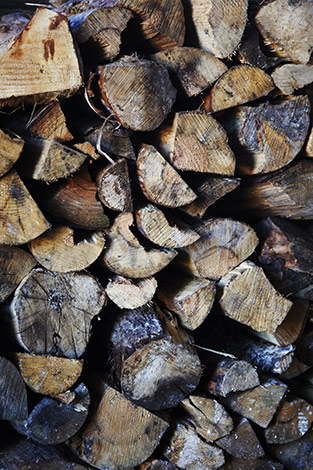
The salt they make here more than measures up to some of the world’s leading salt brands and I would venture to say it’s something very special. Due to the high concentration of salt in the sea around Læsø (up to 14%, against normal 2-3%), the sea salt has been harvested on Læsø since the Middle Ages, but later died due to shortage of fire wood and sand drift.

Back in 1990, when archaeologists began studying the history of Læsø, the idea of ​​salt seething on Læsø was revived with the discoveries made by the archaeologists. Today the salt is made according to the old traditions and recipes.

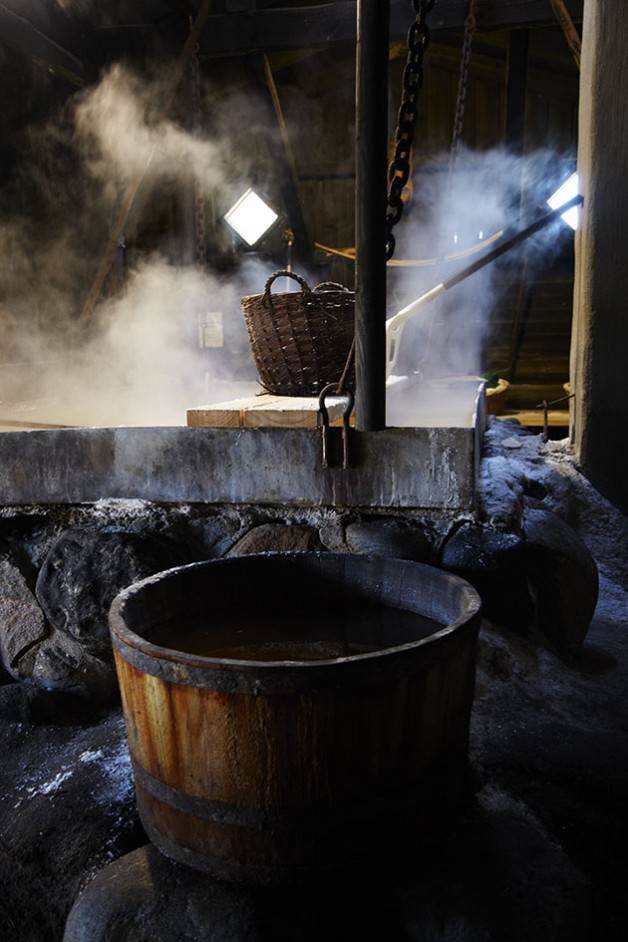
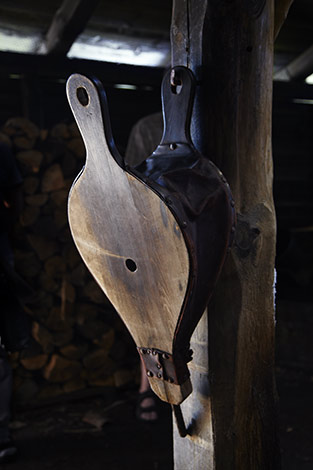
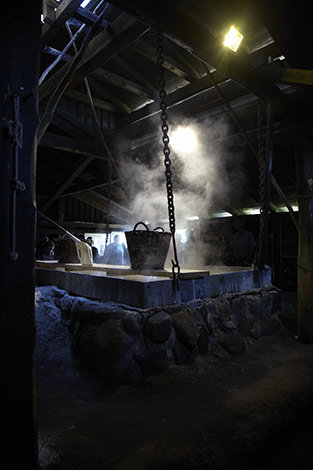
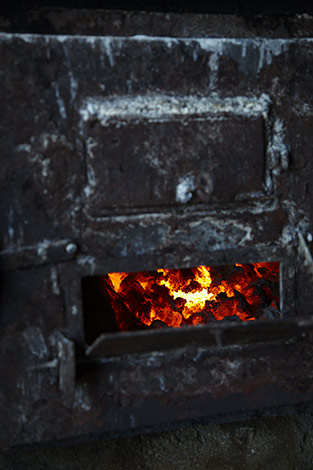
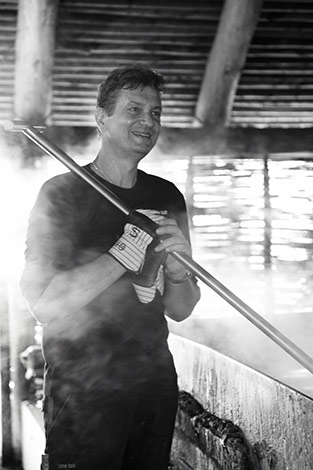
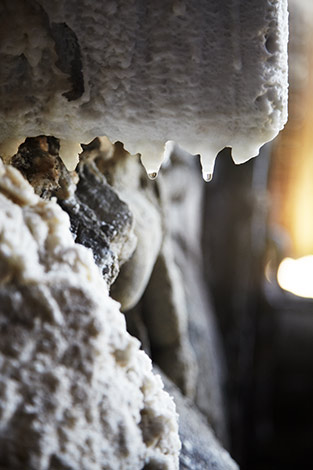
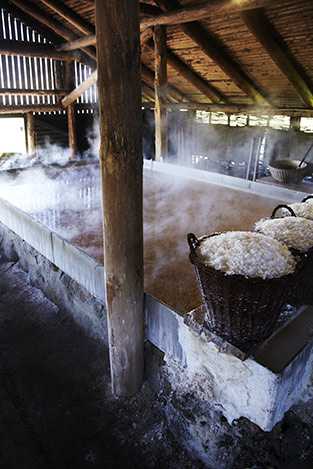
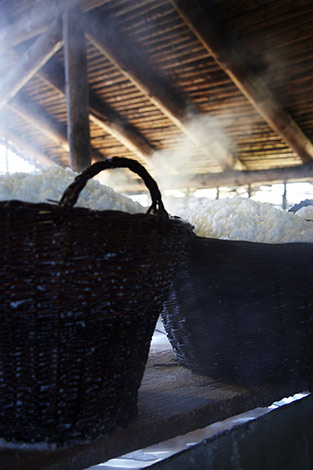
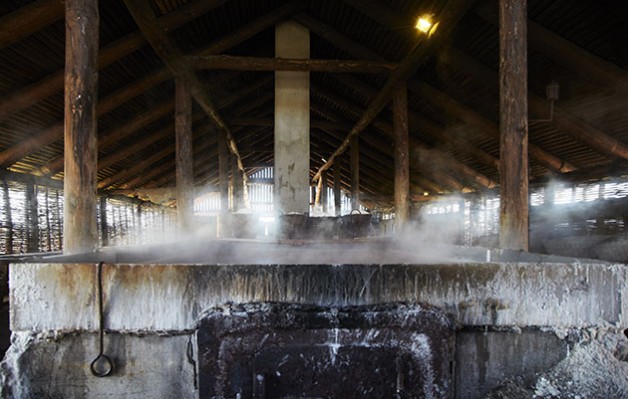
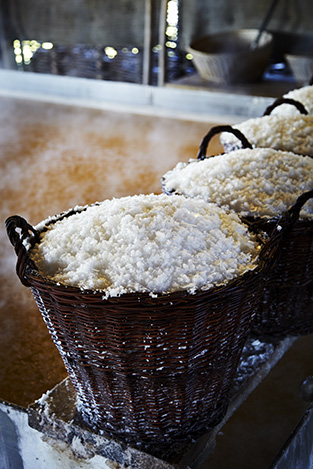
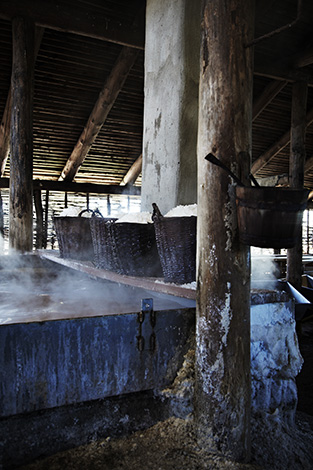
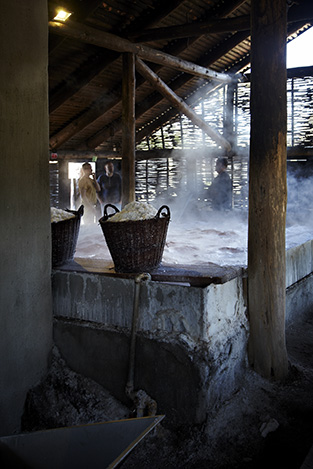
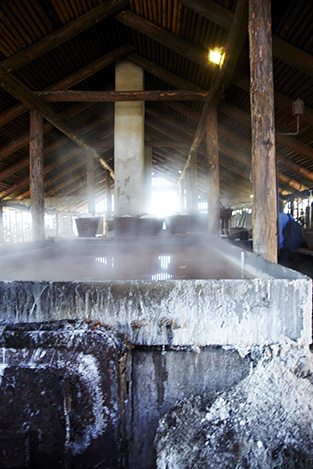
Entering the seething room, it’s warm, humid and dark. The only light is a lamp over the huge seething pan, as well as a bit of daylight flowing under the grassy roof and the open doorway. It’s almost like going straight back into the Middle Ages. This is how the seethery looks. It is designed from archaeologists’ findings of the original salt works, which lay here hundreds of years ago. Saltwater is taken from wells, dug into the lowest parts of southern Læsø and in the saltworks the water is set to evaporate in large pans over open fire. The big pans look like a huge bathtub, with steamy water, as you imagine it would look like in a movie about the wild Northmen from the 16th century.

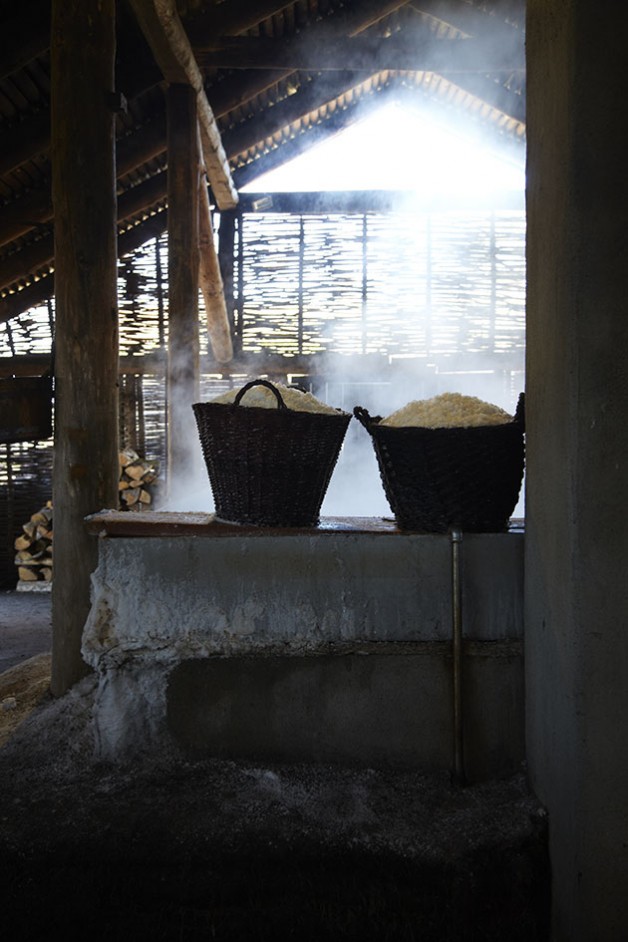
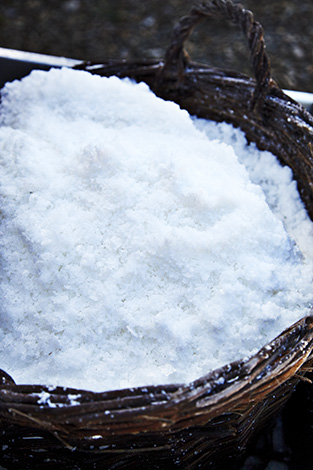
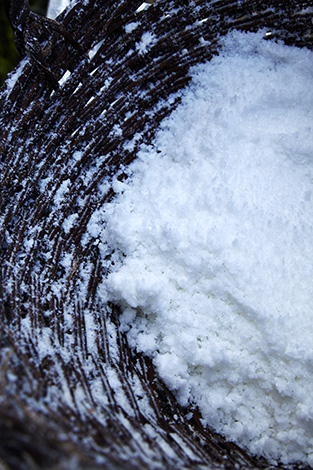
When the salt layer is saturated, the salt crystals are formed on the surface and poured into baskets where the residual water runs off before the salt is added to drying on the drying ceiling. The salt is handmade with respect for nature’s surroundings on the island, and they also give a demonstration of how to sethe salt yourself.

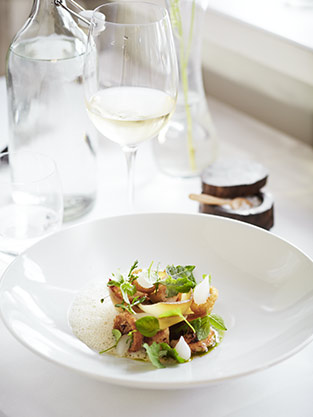
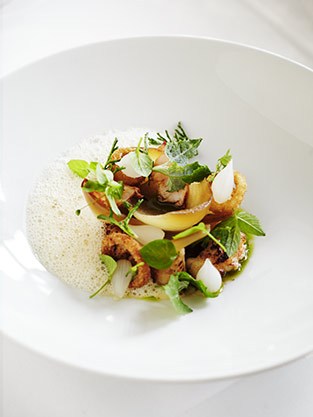
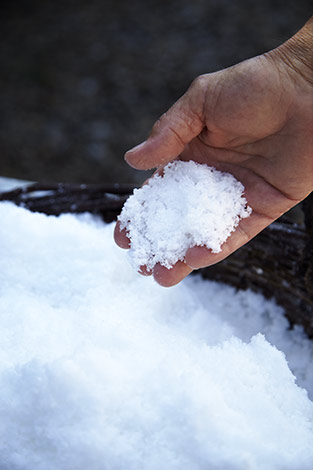
All by-products of the process are used for the Læsø Salt Care skin care series and are excellent treatment for people with dry skin or psoriasis. The salt retains many of its natural minerals such as calcium and magnesium and has a rich flavour. It is porous enough to crush between two fingers. Læsø Salt is the preservation of a lost art and pride and a tasty and beautiful product that is good for many types of cooking, not just to sprinkle over an egg. A visit here inspires a desire to retrieve cooking methods of a bygone era using salt dough for long-term cooking and cure salmon in a new way, as well as exploring salt in the sweet kitchen. One of nature’s most exciting taste contradictions with a lingering selection of salty sweet sensations. From irresistible caramel ice cream to decadent chocolate tart and sweet pavlova, it’s hard to resist this winning combination.

You can check out more of my images from Læsø Salt Works here. And read more about what else to do on Læsø, here & here


Glogg, Mulled Wine

No Christmas party without Gløgg!
This boozy hot drink has lots of memories attached. Skating on the ice rink around Kongens Nytorv in Copenhagen in my mid twenties, without a care in the world – not even the fact that alcohol and ice skating probably isn’t the best mix! And walking around a snowcovered, and to-the-brim fairylight lit Tivoli with my husband, the year we spent Christmas in Denmark.
Add a Nordic touch to your Christmas with this traditional Danish Gløgg. Mine has snaps in it, as it did in Tivoli, and I’ve added some cool garnish too! Merry Christmas!

GLØGG – MULLED WINE
makes 1 litre, serves 6

1 bottle of good quality red wine (I like Central Otago Pinot Noir)
1/3 cup snaps/akvavit
1 cup port wine
1 cup freshly squeezed orange juice
1 cup water
1 tablespoon cardamom pods
2 cinnamon sticks
6 whole cloves
3 whole all spice
2 star anise
orange peel of 1 orange
275g sugar
1/3 cup raisins
¼ cup sliced almonds

Place the port wine in a bowl with the raisins and leave to soak for 24 hours. Pass the port wine and raisins through a sieve, and set the raisins aside. Place the port with water, orange juice, spices, orange peel and sugar in a pot and simmer on low heat for 30 min. The Gløgg mix can be made ahead of time, and kept to use at a later time.

Pass the Gløgg mix through a sieve and remove (and discard) the spices. Add the wine to the Gløgg mix and heat over a gentle heat, do not boil (as this will burn off the alcohol). Add the soaked raisins and sprinkle with almonds. Serve hot, decorated with a cinnamon stick and dried orange slice!

Enjoy this hot drink with respect. The alcohol can hit hard, especially in cold weather!

DRIED ORANGE SLICES

Preheat oven to 120° C. Slice 2-3 oranges thinly and place on baking paper on a baking tray. Heat for about 1 hour or until completely dry.

Ris ala Mande with homemade Cherry Sauce

Ris Ala Mande with Cherry Sauce Ris Ala Mande with Cherry Sauce Ris Ala Mande with Cherry Sauce

I’m back in Denmark for Christmas this year. For the first time in 5 years, I’m spending Christmas with MY family, and I can’t wait! There’s just something strange about spending Christmas in New Zealand, when it’s summer, and I just can’t seem to get into a real Christmas spirit. But this year it’ll be different, and I’m looking forward to showing my husband around a Christmas lit Copenhagen, ice skating and sipping Gløgg (mulled wine).

Obviously the big thing about Christmas is food, and for me as a food photographer, no less! We’ll have all the regulars: Roast duck, pork roast with crackling, caramelised potatoes, gravy, herring and lots of snaps of course! And a classic Danish Christmas dessert, the Ris ala Mande of course! Usually the cherry sauce for the dessert is just a store bought thing, but since I’ve moved to NZ, I’ve always made my own- just because you can’t buy it there. The good thing about that, is that it’s summer there, and cherries are in season, so I make mine out of fresh cherries. So this year, I’ve imported 3 litres of NZ made cherry sauce into Denmark, for our Christmas dessert. My recipe has a dash of single malt whiskey in it. It’s yum!

So, I bring you the recipe for: Ris ala Mande with homemade Cherry Sauce! Merry Christmas!

Ris ala Mande
6-8 portions

1 litre whole milk
2 vanilla beans (I use Heilala Vanilla)
150g arborio rice
2 tablespoons caster sugar
1⁄2 teaspoon salt
100g blanched almonds, roughly chopped
1 whole blanched almond (skin removed)
500ml cream

Cherry Sauce:
makes 3 litres

500g fresh, pitted cherries (alternatively use frozen or jarred cherries)
150g caster sugar
2 vanilla beans (I use Heilala Vanilla)
3 cups water
4 tablespoons cornflour
100 ml whiskey (I use single malt – some might argue that – especially your husband. You could also use cognac)

Place milk and rice in a large pot. Cook over gentle heat, stirring often to prevent rice sticking and burning, for about 20 minutes. Most of the milk should have been absorbed by this stage. Remove pot from heat and cover. Leave to rest 30 minutes. In Denmark it’s common to let the rice porridge rest under the duvet, to heat up the bed (as it’s winter, and cold outside)

Stir in caster sugar and salt. Split vanilla beans and scrape seeds into pot. Fold them through rice mixture. Leave to cool completely. At this stage the porridge can be covered and refrigerated until the day it is needed (up to two days).

On the day of serving, beat cream to soft peaks. Fold about one third through the rice until smooth then fold in remainder with chopped almonds.

Transfer Ris ala Mande to a serving bowl and hide 1 whole almond in the mixture. Cover and keep chilled until ready to serve. Traditionally we serve the dessert with 1 whole almond, and sometimes a few half or 3/4 ones (cheat almonds). Who ever can present the whole almond, wins the almond prize, which is usually another sweet treat, such as a mazipan pig or chocolates. The idea is to keep the almond hidden (if you find it), until all the Ris ala Mande has been eaten.

Sauce: Place cherries, sugar, whole vanilla bean, water and whiskey in a large saucepan. Bring to the boil then simmer 15 minutes.

Combine cornflour with a little cold water. Slowly add to cherry mixture, stirring constantly until sauce thickens. Bring mixture slowly back to the boil then remove from the heat. (Sauce can be made ahead and bottled in sterilised jars).

Serve the Ris ala Mande (rice pudding) at room temperatue with warm cherry sauce.

Merry Christmas!

Pizza on the Weber BBQ

Pizza on the BBQ Pizza on the BBQ Pizza on the BBQ Pizza on the BBQ Pizza on the BBQ Pizza on the BBQ Pizza on the BBQ Pizza on the BBQ

Summer has officially arrived in New Zealand! One thing I love the most about summer is cooking on the BBQ. Last year I discovered cooking pizza on the BBQ, and when you’ve tried it once, it’ll be the only way you’ll ever want to cook pizza again. Pizza on the BBQ is the fool proof way of getting a moist and delishious filling and above all a super crispy base, which you can never seem to get in the oven, regardless of the temperature or quality of pizza stone.

The majority of Kiwis (and probably Ozzies and Americans) swear by th gas BBQ’s and most pizza BBQ recipes will tell you to cook your pizza on a gas BBQ, where you can control the temperature and monitor it 100%, but there is another way. Personally I prefer a coal BBQ any day. This is how it was when I was a kid and the ritural of lighting a fire (or drinking a glass of ice cold chardonnay, while watching your husband lighting a fire) – you just can’t beat it. The smokey flavour of cooking over coals, just adds an extra element to the pizzas and everyone will be coming back for more.

The tricky thing is obviously getting the temperature right, so you don’t burn your base, so you gotta watch your pizza like a hawk. And also you MUST use a pizza stone. But once you’ve tried it a few times, you will master it, and be eating pizza’s with friends and family all summer!

I’m providing you with the recipe for a great pizza dough, that’s my updated version of a pizza recipe I shot for Dish Magazine back in 2010, for their Italian issue. I’ve used wholemeal, stoneground flour for added nutritional benefits, and it is how I prefer my pizza base. Of course you can use plain flour or 00 flour if you like.

Pizza dough
Makes two pizzas, 4-6 serves

1 cup of plain flour or 00 flour
1 cup of stoneground, wholemeal flour
½ teaspoon of sugar
1 ½ teaspoons of instant dried yeast
1 teaspoon of sea salt
1 cup of lukewarm water
1 tablespoon of olive oil

Place all dry ingredients in a large bowl and mix together. Mix the water and oil together in a separate bowl or jug. Gradually add the water to the dry ingredients, little by little, mixing the dough with your hands or a wooden spoon. Be careful not to make the dough too wet and sticky, nor too dry. Once roughly combined turn the dough out on a lightly floured benchtop and knead for 3-5 minutes, until the dough is smooth and slightly sticky and springy. Place it in a lightly floured bowl and cover with plastic wrap or a tea towel. Set aside in a warm place and let rise for 1 – 1½ hour.

Mastering the BBQ & making your pizza

About 10-15  minutes before your dough is ready, start up your BBQ using choal or briquettes. If using briquettes, you might want to get them started around half an hour before the dough is ready. The coal is quicker to start up, but also burns out faster. The briquettes take longer to get ready for cooking, but will hold the heat a lot longer. We usually use coals when it’s just the two of us, and briquettes when cooking for more people.

Once doubled in size, split the dough into two portions and roll out thinly on a lightly floured bench top. Place the pizza base on a piece of baking paper, and fill with your favorite filling. I’ve used:

Organic tomato paste
1 whole zucchini sliced sideways with a potato peeler
Red onion, thinly sliced
Cherry tomatoes (from the Curious Croppers)
Prosciutto
Buffalo mozzarella
Homemade pesto
Salt & pepper

Once the coals or briquettes have settled down, and turned to embers, place your pizza stone on the BBQ about 5 minutes before you’re ready to cook it, to let the stone heat up properly. Then transfer your pizza, with the baking paper underneath, to the pizza stone, and cover your BBQ with the lid. Make sure to have the air vents open, to keep the air circulating around the pizza and ensure even cooking of the base and the top. Depending on the amount of heat in your BBQ, your pizza will cook in 15-20 min. Keep an eye on it every 5-10 minutes, making sure the base doesn’t burn. If the base colours too quickly the BBQ is too hot, and you should wait a little while longer, next time, to let the coal settle a bit more. Once the base has firmed up, you can remove the baking paper. When the base is crispy and the cheese on top slightly melted, garnish with fresh basil. Your pizza is ready to serve!

ENJOY!

Don’t drink and fry!

Visit Strandgaarden Badehotel

Strandgården Badehotel, Læsø Strandgården Badehotel, Læsø Strandgården Badehotel, Læsø Strandgården Badehotel, Læsø Strandgården Badehotel, Læsø Strandgården Badehotel, Læsø Strandgården Badehotel, Læsø Strandgården Badehotel, Læsø Strandgården Badehotel, Læsø Strandgården Badehotel, Læsø Strandgården Badehotel, Læsø Strandgården Badehotel, LæsøStrandgården Badehotel, Læsø Strandgården Badehotel, Læsø Strandgården Badehotel, Læsø Strandgården Badehotel, Læsø Strandgården Badehotel, Læsø Strandgården Badehotel, Læsø Strandgården Badehotel, Læsø

My last stop for the day of my visit to Læsø this time around was Strandgaarden Badehotel.

Strandgaarden beach hotel offers an idyllic setting and located just 4 minutes walk to the beach, it’s the perfect spot for a relaxing summer holiday. I could have stayed here for weeks on end, reading, relaxing, swimming, and taking heaps more photos, enjoying the Danish summer when it’s at its best. This place is so quaint and cute, that I just had to dedicate a whole blog post to it.

The hotel was built in 1727 and parts of the original building are still in use. The owner takes pride in keeping the hotel in its original idyllic state with thatched roof and half timbering, but with all the commodities of modern day living. Such is the hotel kitchen, which each year has a new, up and coming Danish chef have a chance to stand up to the big boys, with the title as head chef at Strandgaarden Badehotel. The owner Ole Lind, has gotten pretty good at picking them, and for many years Strandgaarden has earned much appraisal in the media across Denmark. Every evening the menu changes according to the season and what’s available on the island, so what’s served tonight will most likely not be served tomorrow. The element of surprise is one of the things I find intriguing about the restaurant here alongside the presentation of the food by the table, by the kitchen chefs – Nicolas Højgaard Michaels and head chef Thomas Wetle Andersen.

I was served:

Homemade Sourdough Rolls & Browned Butter stirred with Butter Milk, Crème Fraiche and Onion Powder
Amuse Bouche: Seaweed Chips, Lobster Mayo and Chervil + Pork Belly, Parsley Puree and Spiced Crackling
Starter: Scampi, Kohlrabi and Green Strawberries
Main: Lobster, Scallops and Yellow Peas
Dessert: Dark Chocolate, Truffle and Blackberry Granita
All accompanied by a Sparkling Rosé to begin, a NZ Honky Dory Sauvignon Blanc for the starter and the main and a Riesling to end.

Thumbs up to both of the chefs! I loved the sourdough rolls with the browned butter, and if it wasn’t because it requires some pretty expensive, high end pro kitchen gear, I would make that butter myself. Everything else was delicious too, particularly the main, which really played with, not just the flavours but also the textures. It’s not often I say it, but the highlight of the meal was definitely the dessert. The surprising taste of the chocolate cake, which I was told later was the influence of the truffle, was really interesting and intriguing. I suppose after shooting a sweet and savoury book about Vanilla, those combinations of savoury flavours with sweet or vice versa, is really something I notice.

After a very tasty meal, a quick chat to the chefs and tons of photos later, I had to end the evening watching the sunset on the beach. It’s one of those things I love! It’s the perfect ending to a perfect day, before going to sleep in one of Strandgaarden’s super comfortable beds.

Thanks to Ole Lind at Strandgaarden Badehotel for excellent service! Read more about Strandgaarden on their website or join their facebook page for regular news and updates.

Next up are some of things I got up to in Copenhagen, so please come back soon!

Nordic Sea Salt

Læsø Saltsyderi Læsø Saltsyderi Læsø Saltsyderi Læsø Saltsyderi Læsø Saltsyderi Læsø Saltsyderi Læsø Saltsyderi Læsø Saltsyderi Læsø Saltsyderi Læsø Saltsyderi Læsø Saltsyderi Læsø Saltsyderi Læsø Saltsyderi Læsø Saltsyderi Læsø Saltsyderi Læsø Saltsyderi Læsø Saltsyderi Læsø Saltsyderi

If you’ve worked with me in my studio, or just gotten to know me, while I’ve been in New Zealand,  you might have been so lucky to recieve as a present, a cute little linnen bag, tied with a piece of string and filled with pourus sea salt crystals, along with an attempt from me to explain why this salt is awesome!

You might have thought:  “Wow, how awesome can salt be?” or “I thought Maldon salt was supposed to be the awesome salt!” Well Maldon salt is awesome, and I know the “REAL” salt to use if you are a chef or a real foodie. But Maldon, move over, because here’s the story and the images to show, why I think Læsø Salt is more awesome.

As a visual person, I buy with my eyes (not everything and always, but often). A product has got to look good or sell me the idea of looking good. Well for starters Læsø Salt does just that. Just take a look at the place where they make it!
It is full of beautiful photo opportunities, and if my dad hadn’t been hanging around, waiting for me to finish “doing my thing”, I could have spent the whole day here. Although I think I got some pretty cool shots after all.

We are still on the island Læsø, as I wrote about the other day and the first visit on my itinerary of the day. At the edge of a pine forrest, south of the town Byrum, bordering the open plain of the the truly windblown parts of Læsø, lies Læsø Salt Works. It is both the place where they make Læsø Salt, but also a tourist attraction that tells a lot of the story on life on Læsø back in the day. Without making it too long and boring (the guides at Læsø Salt does not), I’ll try to explaing why this place, and the salt, is so special.

Due to the high concentration of salt in the sea around Læsø, the making of sea salt has been happeing on Læsø since the middel ages, but then since died out. Back in 1990 when archeoligists started looking into some of the history of Læsø, the idea of salt seething on Læsø was brought back to life using the discoveries the archeologists made. Today they seethe salt after the old traditions and recipes and make just enough to meet demands and keep Læsø Salt Works a healthy business.

The salty water is brought in from wells, dug in the lower parts of southern Læsø. In the Salt Works the water is set to evaporate over the fire. Once the brine is saturated, the salt crystals form on the surface and is scooped up into the baskets where residue water runs off, before the salt is set to dry in the drying addic.

The salt still retains a lot of the minerals and has a full-bodied flavour. It is porous enough to be perfect for crushing between two fingers before seasoning any dish. The salt is hand made and with respect for the nature sourroundings of the island. All biproducts of the seething is used for Læsø Salt Care scin care range and is excellent treatment for people with dry skin or pshoriasis. So apart from the oddness in bringing sea salt across the globe to New Zealand, Læsø Salt meets a lot of my criteria for many products that I buy. I like to support: My local community, the preservation of a lost art, AND pride and effort into making a tasty and beautiful product.

Read more about Læsø Salt Works in English here and in Danish here. Stay tuned for another awesome place to visit on Læsø, soon!

Idyllic island Laesoe in Denmark

Strandgården Badehotel, Læsø Strandgården Badehotel, Læsø Læsø Læsø Læsø Læsø Læsø Læsø Læsø Læsø Læsø

If you’ve been following my instagram feed or my facebook page lately, you might have noticed that I’ve been on a trip home to my native Denmark recently. Having only just returned to New Zealand last week, I’m struggling to cope with the depressing wet New Zealand winter weather and the lack of proper heating and insulation at my studio. So I have emerged myself into working through all the images I’ve done, while I’ve been away.

Over the next month or so, I’ll keep the theme of the blog in the name of Denmark, Danish summer, Copenhagen eateries and all things Danish, while I wait for the New Zealand summer to return. If you love everything Scandinavian and miss summer too (or are in fact enjoying Danish summer at the moment), I’m sure there’ll be something for you to be inspired about, get your wanderlust itching again or just take your mind off the crappy weather for a bit.

I’ll start by introducing a place that’s very close to home, or should I say close to “my hometown” and my heart. Somewhere truly idyllic! The Island Læsø in Denmark or Laesoe (in English) is a small island in the North Sea bay Kattegat, just off the coast of the peninsula Jutland, the Danish mainland.

An hour and a half’s ferry ride from my hometown Frederikshavn, you’ll find this idyllic island, also referred to as Kattegat’s perle: “The Pearl of Kattegat”. Once you step off the ferry (or pretty much when you get on it actually), you know you’re on island time. My grandmother grew up here, so I’ve been coming here since I was a little girl, but it’s only after I moved to New Zealand, I’ve come to actually really love this place. It is windblown (due to the lack of hills) but peacefull. It’s full of nostalgica and by gone days of old school Danish fishermen and small town charm. This is truly the outskirts of Denmark, but if you are feeling stressed out, you’ve come to the right place to relax! The island has an amazing and unique nature, and you’ll find the beauty in the small things, such as riding a bike from one end of the island to the other (21km), go horseback riding on Icelandic Ponies or taking a swim at one of the many beaches. The island is known for it’s scampi festival in August and the cute half-timbered houses thatched with seaweed.

The next few upcoming posts, I’ll show a few of the really great places on the island, Læsø Salt Works and a really good place to eat (and sleep). So please stay tuned!

Red Basil Pesto

Red Basil Pesto Red Basil PestoRed Basil Pesto Red Basil PestoRed Basil Pesto Red Basil PestoRed Basil Pesto Red Basil Pesto

I’ve noticed when I make pesto, like the one I did the other day, the basil tends to go brown, after a while. After advice from Annabel Langbein and a bit of reserch on the internet, it seems that blanching the leaves beforehand is the answer to ever delicious looking pesto. So here is an updated version of my pesto recipe that will work just as well with red basil pesto as with green. This time I’ve used pecan nuts, which I think work well with the more bitter flavour of the red basil, but you can use pine nuts as in traditional pesto, if you prefer.

 Red Basil Pesto

2 cups fresh basil leaves, green or red
2 cloves of garlic
1/4 cup pecan nuts
1/2 cup olive oil
1/2 cup grated parmesan cheese
Salt & pepper to taste

Toast the pecan nuts lightly over medium heat until golden. Be careful not to burn. Leave to cool. Blanch the basil leaves for just a few seconds in plenty of boiling water, then rinse and cool in an icebath. Dab the leaves dry on a clean teatowel. They don’t need to be superdry, just not soaking wet, so they water out the pesto. Place all ingredients in a blender and mix until smooth. Add salt and pepper to taste.

Transfer the basil pesto to clean glass jars, and pour over a little olive oil to cover, then seal. The pesto will keep in the fridge for up to two weeks.

Semi Dried Tomatoes

Baked Tomatoes Baked TomatoesBaked Tomatoes Baked Tomatoes

All this talk about tomatoes, I thought maybe a recipe was in order. Just at the end of the season, if you aren’t growing tomatoes yourself, it should be easy to get loads of them for cheap. Use this easy recipe to intesify and store their beautiful flavour.

Semi Dried Tomatoes
Makes 2 jars

3 kg small tomatoes, preferably plum tomatoes or cherry tomatoes
Olive oil, for cooking
Salt and pepper
1 tablespoon sugar
5 cups of olive oil
Fresh basil (or any other preferred herb)
5 cloves of garlic

Half the tomatoes, spread them on a roasting pan, and drizzle with olive oil. Sprinkle with salt, pepper and sugar, and then put them in the oven and bake for 10-12 hours at 100 degrees – preferably overnight. Keep an eye on them towards the end of the cooking time. You don’t want them to be completely dried, but still soft and plump.

Once done to your liking, leave to cool. Place the semi dried tomatoes in glass jars with basil (or any other preferred herb), whole garlic and cover with olive oil.  Seal and place them in the refrigerator. They will keep in the fridge for a couple of months. You can also bake capsicums and chilli to mix in with the tomatoes. Great on toast with goats cheese and basil pesto.

Homemade Basil Pesto

Basil Pesto Basil Pesto Basil Pesto Basil Pesto

On the deck of the studio, I’ve always got a selection of herbs growing. They are great to have handy for shoots, and off course they look nice as well. At the moment, I’ve got more basil than I can eat, so I decided to make some of it into pesto. Here’s a quick and easy recipe:

Basil Pesto

2 cups fresh basil leaves
2 cloves of garlic
1/4 cup pine nuts
1/2 cup olive oil, plus a little extra for storage
1/2 cup grated parmesan cheese
Salt & pepper to taste

Toast the pine nuts lightly over medium heat until golden. Be careful not to burn. Leave to cool. Place all ingredients in the blender and mix until smooth. Add salt and pepper to taste.

Transfer the basil pesto to clean glass jars, and pour over about 1/2 cm of olive oil to cover, then seal. The oil will prevent the pesto from browning. The pesto will keep in the fridge for up to two weeks.